Showing posts with label DIY. Show all posts

Saturday, April 7, 2012

Easter Eggs Designers Will Dye For.


There are an incredible amount of beautifully created and designed Easter Eggs out there. Nowadays people use everything from temporary tattoo papers, glitter, metallic paints and rub down letters to create eggciting ones. Several even use fabrics, etching, cut-out paper and appliques.

However, here are a few beauties that still use the good ol' dye you can make on your own.

If you've got the patience, you can make the fabulous Pantone dyed Easter Eggs shown at the beginning of this post that Jessica Jones of How About Orange created for 2012.


An homage to CMYK printing, Martha Stewart shows you how to make the beautiful three dot eggs shown above here.

Below are more stunning egg designs with links to tutorials from Martha Stewart:

above: learn how to make the scrambled lines and letter eggs here

above: learn how to make these lovely botanical silhouette dyed eggs here

above: learn how to make the square patterned eggs here

above: learn how to make the leaf and stenciled eggs here

above: learn how to make the stenciled eggs here

And for those of you who don't want to get your hands dirty, you can digitally create Easter eggs with this free Easter Egg Design app for the iPhone

And don't forget about the EggBot!


• Be sure to check out these 30 inspiring Easter Egg designs at Inspiration Feed

Friday, February 10, 2012

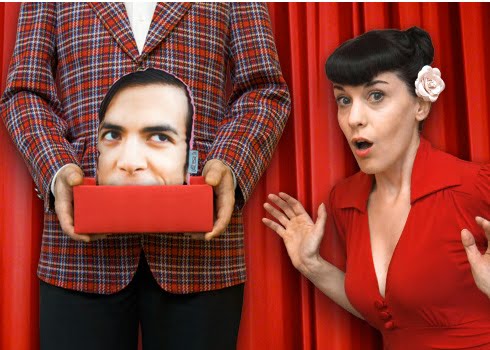
Creepily Cute Custom Photo Printed Pillows From Pillowmob.


This guy will stay and cuddle as long as you'd like. An image of your favorite person, pet, place or thing can be printed on handmade machine washable pillows. Long distance relationships, those on a diet, fur-allergic pet lovers, even Narcissists can benefit from the $25 throw pillows. And they make a great Valentine's Day gift.


• Two sizes and shapes are available (oval measuring 7" x 11" or round measuring 9" in diameter)
• Vibrant colors and pattern choices for the backside of the pillow
• Free worldwide delivery


Photo Pillow Specifications:
Pillow Dimensions: 7 x 11 inches (oval), 9 x 9 inches (circle) / 18 x 28 cm (oval), 23 x 23 cm (circle)
Shell Material: polyester
Fill Material: polyester
Pillow Weight: 7 oz. / 198 g.
Print Resolution: 180 dots per inch
Place of Origin: Seattle, USA
Care Instructions: Machine washable, cold water with like colors. Air dry.
Manufacturer: PillowMob, LLC

Browse their selection or make your own here.

Monday, December 19, 2011

It's Snowing Star Wars! 10 new DIY Star Wars Paper Snowflake Templates for 2011.


above: Yoda, one of the ten new DIY Star Wars paper snowflakes for 2011


This year, one of my most popular posts has been my 2010 how to make your own Star Wars snowflakes (Darth Vader and a Bobba Fett/Clone snowflake) as taught by a husband and wife team.

Well, now it's snowing Star Wars!
Two more designers, Anthony Herrera and Chaunce Dolan of Matters of Grey have jumped on the paper Star Wars Snowflake bandwagon and provide us with ten new Star Wars paper snowflake templates for 2011.


above illustration by Anthony Herrera

A new Darth Vader, Yoda, R2D2, C-3PO, Scout Troopers, Storm Troopers, Clone Troopers, Admiral Ackbar, Ashoka, and Boba Fett snowflakes you can make yourself with some paper, a pair of scissors, a downloadable template and a little help from The Force.

c3po Snowflake:

R2D2 Snowflake:

Scout Trooper Snowflake:

Storm Trooper Snowflake:

Clone Trooper:

Ashoka Snowflake:

Admiral Ackbar Snowflake:

Darth Vader Snowflake (new for 2011):

Boba Fett Snowflake (new for 2011):

The Yoda paper cut snowflake is shown at the top of this post.

The pdf diagrams/templates of all the above can be downloaded here.

and the original two...
Darth Vader Snowflake:

Boba Fett and Clone Trooper Snowflake:

pdf diagrams/templates of the above two can be downloaded here


"Have A Merry Christmas, You Will."


Looking for Star Wars related gifts? Check these links:

Other Star Wars toys, Star Wars christmas ornaments, figurines and more

Star Wars Books, Movies, Calendars and more from Amazon

Friday, October 28, 2011

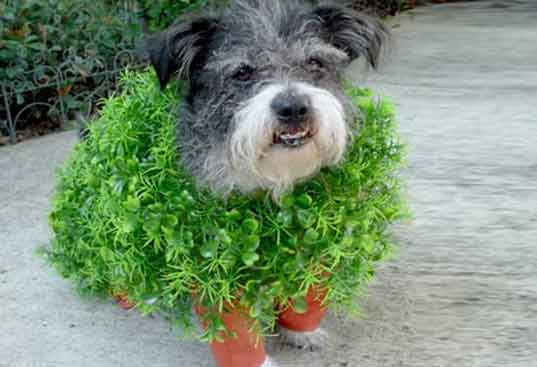
How To Turn Your Dog Into a Live Chia Pet This Halloween.


Personally, I'm not a big fan of dressing up dogs. However, The Flirty Guide (Stacie Tamaki) shares with us a way to make this terrific "Howl"ween costume, turning your dog into a live Chia Pet. All you need are some plastic aquarium plants, muslin, fabric, elastic straps, felt and a willing participant. (Note: a "green" version of this costume is possible by using organic materials and eco-friendly felt as shown in the photo at the beginning of this post, courtesy of Inhabitat).


Needed elements for the Terracotta legs:
•An inner liner made of muslin
• An outer layer using terra cotta colored fabric
• Two straps and a cross strap connecting the first two together. The first straps are attached at the top of each leg, suspender style, to hold them up once you slip all four legs onto your dog.


The Steps:
1. Sew an inner leg liner using muslin or another fabric that is thin enough to bend if your dog wants to sit or lie down.
2. Sew and outer terra cotta leg with appropriately colored fabric that is also thin enough to fold and bend for your dog's comfort.
3. Make sure they are both the same width at the bottom. Drop the liner inside the terra cotta layer and fold the terra cotta layer under allowing you to sew them together with a single pass of your sewing machine.
4. Now stitch the two layers together at the top in only two places where the strap will fasten along the outer side of your dog's leg and directly across from it on the other side. This holds the two layers together without binding them completely and eliminates the need to make the pant legs fit your dog's leg perfectly. This way the pant legs can loosely fit, be comfortable and look great!
5. Once you've stitched the top of the legs together sew the felt strap along the outer side of the pant leg.
6. Do one leg first, then slip the other pant leg on your dog's other leg and pin it into place along the strap you're attaching them to. Make sure you can slip it off, bending your dog's leg to do so, and you've got the perfect length to trim the strap to.
7. Attach the other pant leg same as the first.

Elements for the covering and foliage:
• Felt to make a blanket or body cover and fabric for lining so the plastic plants do not irritate your dog.
• Plastic aquarium plants that come attached to grids (available at Petco) or organic plants for the green version:


To attach the plastic foliage, pull all of the foliage off the mats. Then make a horse blanket out of green felt and strategically cut holes in the felt using an x-acto knife. Push the prongs of the grid through the holes and reattach the foliage alternating the two different types of leaves. Then line the entire costume on the underside so that none of the plastic will poke through and make your pet uncomfortable.

And Voila! Ch Ch Ch Chia.... Chia Dog!


Images and instructions courtesy of the Flirty Guide Blog.